
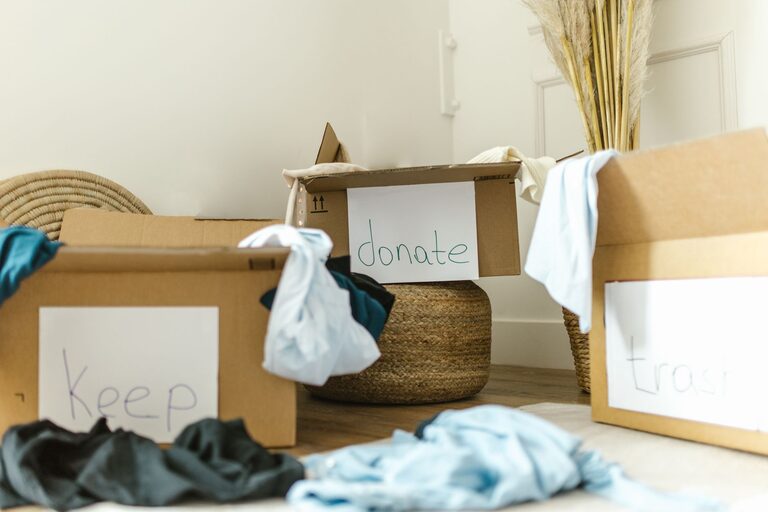
Decluttering your entire home can feel overwhelming, especially when every room seems to need attention at once. A room-by-room approach makes the process more manageable. Instead of trying to organize everything in a single weekend, focus on one space, one category, or even one drawer at a time.
The goal is not to create a perfect home. It is to make your space easier to use, simpler to maintain, and more comfortable for everyday life.
Start With a Simple Decluttering Plan
Before you begin, choose one room and set a realistic time limit. Thirty minutes can be enough to make visible progress. If you have more time, work in short sessions with breaks in between.
Prepare four sorting categories:
– Keep: Items you use and want to keep
– Donate: Useful items you no longer need
– Recycle: Materials that can be recycled properly
– Discard: Items that are broken, expired, or unusable
You may also create a temporary “relocate” pile for items that belong in another room. Move these items after the session so they do not become a distraction.
Begin with easy decisions. Removing obvious trash and items you no longer use can build momentum. Save sentimental belongings and difficult choices for later.
Declutter the Entryway
The entryway often becomes a drop zone for shoes, bags, mail, keys, and seasonal items. Clearing this area can make the whole home feel more organized.
Start by removing everything from the floor, a nearby table, or a storage bench. Return only the items that belong there and that you use regularly.
Helpful ideas include:
– Keep only the shoes used during the current season near the door
– Add a small tray for keys and sunglasses
– Use hooks for frequently worn coats and bags
– Create a basket for items that need to leave the house
– Recycle old flyers and sort mail as soon as it arrives
If the entryway has limited storage, choose one container for each category. A small basket for hats, a rack for shoes, and a few hooks may be all you need.
Simplify the Kitchen
Kitchens often collect duplicate tools, unused appliances, food containers, and expired pantry items. Work in sections rather than emptying the entire kitchen at once.
Start With Cabinets and Drawers
Remove items from one cabinet or drawer and wipe the surface clean. Group similar items together, such as cooking tools, baking supplies, and serving pieces.
Consider letting go of:
– Duplicate utensils
– Chipped dishes
– Containers without matching lids
– Appliances you rarely use
– Gadgets that perform only one unnecessary task
– Promotional cups and excess reusable bags
Return the items you use most often to the easiest-to-reach locations. Store occasional items higher up or in less accessible cabinets.
Review the Pantry and Refrigerator
Check dates and condition before returning food to storage. Group pantry items by type, such as grains, snacks, canned goods, and baking supplies. Place older items toward the front so they are easier to use first.
Avoid buying more storage containers until you know what you truly need. Too many containers can add to the clutter instead of solving it.
Create a Calmer Living Room
Living rooms often serve several purposes, so clutter can build up quickly. Books, toys, remotes, blankets, paperwork, and hobby supplies may all collect in the same space.
Begin by clearing surfaces, including coffee tables, shelves, and side tables. Keep only items that are useful or add something meaningful to the room.
Try these practical solutions:
– Use a basket for blankets
– Store remotes in one small container
– Limit decorative items on open shelves
– Keep books that you plan to read or reread
– Create a designated spot for children’s toys
– Remove furniture that blocks walkways or is rarely used
Do not feel obligated to fill every shelf or corner. Open space makes a room easier to clean and can help it feel more restful.
Organize the Bedroom
A bedroom should support rest, not become a storage area for unfinished tasks. Start with the floor, nightstand, and visible surfaces before moving to the closet.
Remove items that belong elsewhere, empty cups, old receipts, and clothing that is waiting to be sorted. Keep your nightstand limited to a few useful items, such as a lamp, book, or alarm clock.
Declutter the Closet
Take clothing out by category rather than emptying the entire closet. Begin with one group, such as shirts or shoes.
Ask yourself:
– Does it fit comfortably?
– Have I worn it recently?
– Is it in good condition?
– Does it suit my current lifestyle?
– Would I choose it again today?
Set aside items that need repair and give yourself a clear deadline. If you do not repair them by that date, consider donating or recycling them according to local guidelines.
Store seasonal clothing separately if space allows. Use matching hangers only if you already have them; buying new products is not necessary for progress.
Tidy the Bathroom
Bathrooms are usually quick to declutter because many items have clear uses and expiration dates. Check drawers, cabinets, and shelves for products you do not use.
Discard empty containers, dried-out cosmetics, old samples, and products that no longer suit your needs. Follow local disposal instructions for any products that require special handling.
Group items by purpose:
– Daily care
– Hair care
– Cleaning supplies
– First aid
– Travel items
Keep everyday products within easy reach and move backups to a separate area. A small bin or tray can prevent loose items from spreading across the counter.
Make the Home Office More Functional
Paper and office supplies can quickly take over a workspace. Start by sorting paperwork into three groups: action needed, reference, and recycle or discard.
For digital files, create a few clear folders and remove duplicates when possible. Avoid creating too many categories, since a complicated filing system is harder to maintain.
Other useful steps include:
– Keep only the pens and supplies that work
– Store cables together and label them if needed
– Clear old notes from your desk
– Move unused equipment out of the main work area
– Keep one inbox for incoming papers
At the end of each work session, take two minutes to reset the desk. This small habit can prevent clutter from building again.
Finish With Storage Areas
Once the main rooms are complete, move to closets, the laundry area, basement, garage, or other storage spaces. These areas often contain items kept “just in case.”
Handle one shelf, box, or category at a time. Avoid taking everything out unless you have enough time to finish sorting and returning items.
Ask whether each item is:
– Used regularly
– Difficult or expensive to replace
– Connected to a current activity
– In good enough condition to keep
Labeling boxes can help, but labels should describe broad categories clearly. For example, “holiday decorations” is more useful than a vague label such as “miscellaneous.”
Maintain Your Decluttered Home
Decluttering works best when it becomes a regular habit. Set aside a few minutes each week to return items to their proper places and remove anything that no longer belongs.
Try these simple routines:
– Use the one in, one out rule for clothing or similar items
– Keep a donation bag in a closet
– Sort mail near the recycling bin
– Finish one small task before starting another
– Do a five-minute evening reset
– Review one drawer or shelf each month
Decluttering is not a one-time project. Homes change as routines, interests, and needs change. By working one room at a time and making small decisions regularly, you can create a home that feels more spacious, useful, and comfortable without trying to change everything at once.